Friday, January 20, 2023

Doodlebug Design | Day to Day Collection August Calendar

Have you enjoyed the Design Team's Day to Day inspiration?  There are so many ways to use this collection... you can use it as a planner, a way to document your memories... they would even make a fabulous calendar gift with photos for friends and family!  I'm completing our posts with the month of August!  Summer is a fun time in our world... we spend our weekends with friends and family on the water! Again, I used the Day to Day collection as a way to document our activities.  Take a peek...


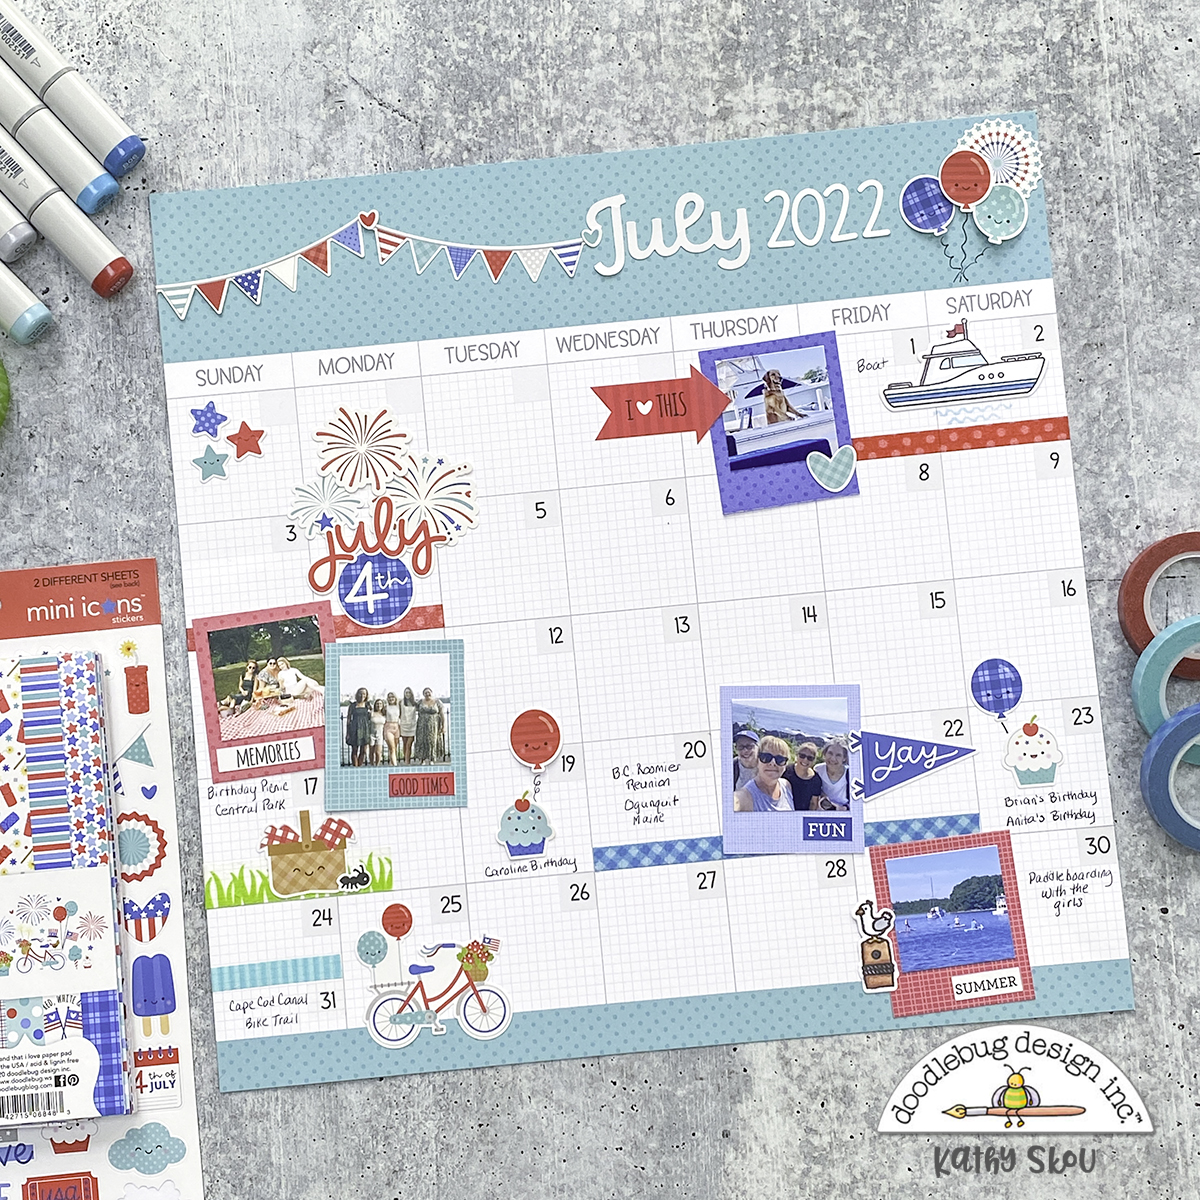
I used elements from the Seaside Summer Collection to embellish my calendar.  I also used my Insta photo trick, as I did on my July Calendar.  It's really easy to get this look.  I printed my photos 1.5" square.  I then cut papers from the Seaside Summer 6x6 pad and some petite prints to be 1.875" x 2.25", and then positioned my photo on the upper part of the paper to get the look.


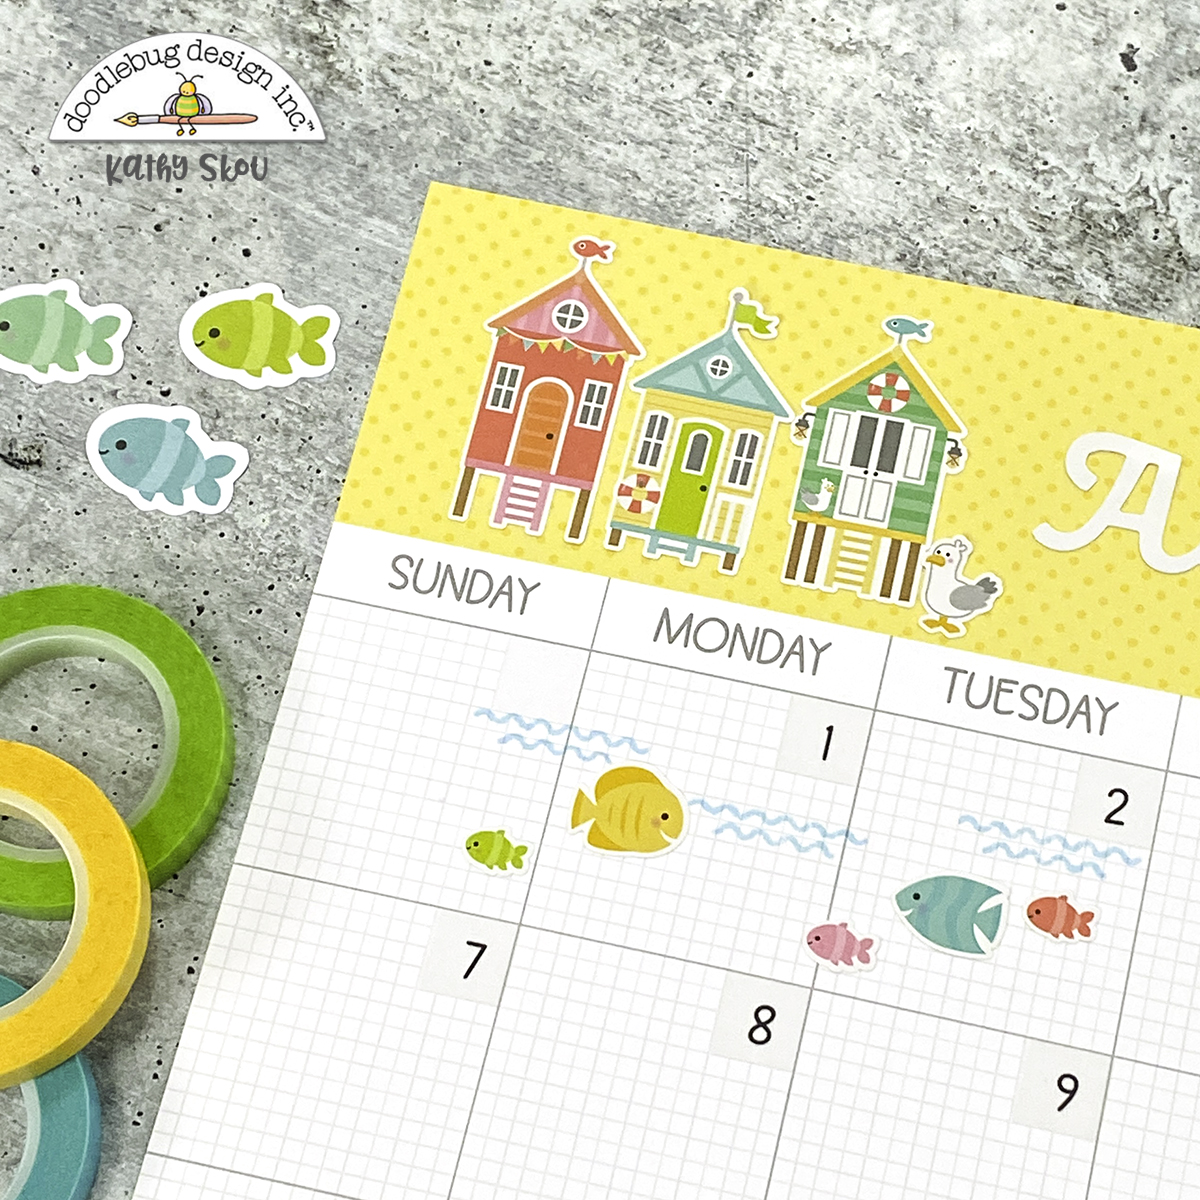
The great part of these calendars is there is a lot of space to "play."  You can decorate the top banner of the page, and also the blank days of your calendar.  I used the water stamp from the Seaside Summer Doodle Stamps and some fish from the Mini Icons to add some fun to the open space.


In addition to the Mini Icons, I used a lot of the Seaside Summer Puffy Stickers to add some dimension to my layout.  That board was the perfect way to embellish the photos of my daughter & her boyfriend paddleboarding!


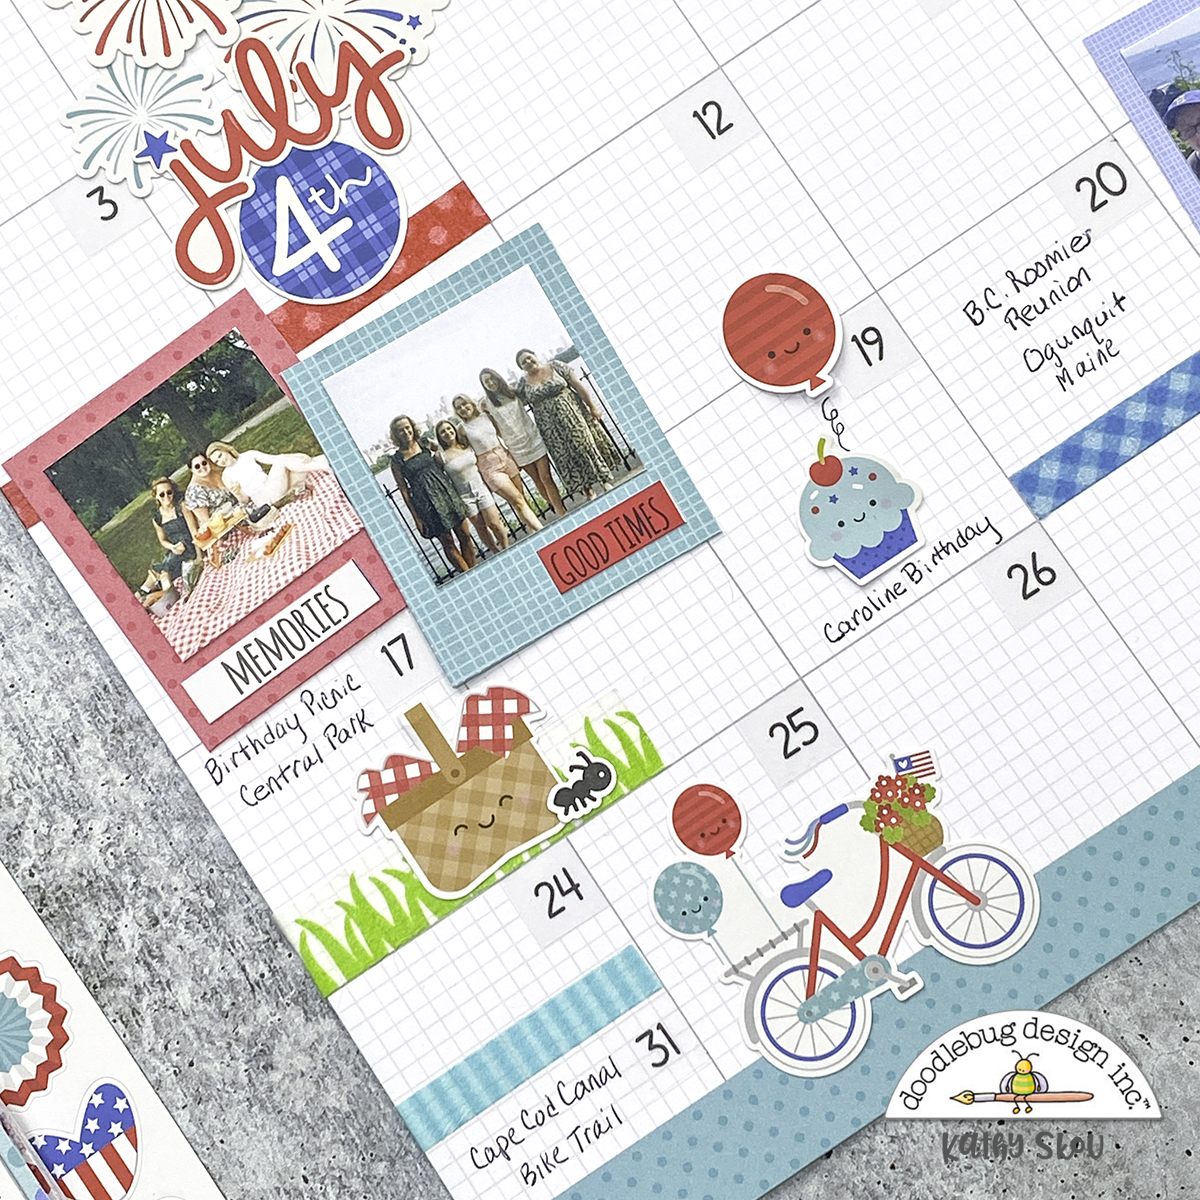
The word stickers on the This and That Cardstock Stickers are perfect as captions for your photos! And that margarita puffy sticker... perfection!


I added a bit more color to the bottom banner using one of the 12" stickers from the This & That Sheet.
I've had so much fun with these calendars. So much so that I'm planning a 2023 album featuring a page a month!  I think it would be a fun way to keep up with my monthly scrapbooking!  That's it for me today, thanks for stopping by to peek!


DOODLEBUG PRODUCTS USED

Day to Day Collection
Seaside Summer Mini Icon Stickers
Seaside Summer Puffy Stickers
Seaside Summer This & That Cardstock Stickers
Seaside Summer 6x6 Pad
Petite Prints
Candy Stipe Washi Tape - tangerine
Stripe Washi Tape - bumblebee
Polka Dot Washi Tape - swimming pool

Monday, January 16, 2023

Doodlebug Design | Day to Day Collection Monthly Scrapbooking

The new Day to Day calendar pages are not only a great way to organize and plan... they also are a fabulous way to document your month!  I opted to create  a scrapbook page layout featuring photos from last July using the Swimming Pool Calendar sheet and some Land that I Love Mini Icon Stickers.  Take a peek....


For my heading I used the new Day to Day Month stickers and numbers from the Sunshine Stickers.  The banners and balloons are from the Land that I Love Mini Icons.


We are big boaters and spend our summer weekends at our marina... so I had to add the cute boat stamped image from the Seaside Summer Doodle Stamps.  I picked some of my favorite photos from the month including this cutie... Parker is our neighbor at our marina.  He's such a good boy!   To create my little insta-photo pictures, I first cut my photos to be 1.5" square.  I then cut some petite prints 1.875" x 2.25" and added my photo leaving more room at the bottom to look like an instant photo.  


In addition to the Land that I Love mini icons... I also used a few mini icons from the Bar B Cute Collection along with some grass washi.  The little picnic basket was perfect to document my daughter's birthday picnic in Central park!  


I used some of the word stickers on the Land that I Love This and That Sticker sheet to label my photos... I love these words!!  Lastly I added one of my favorite characters... Steven Seagull from the Seaside Summer Stamp set. He just makes me smile!

This is such a fun way to keep up with your monthly scrapbooking!  That's it for me today, thanks for stopping by to peek!


DOODLEBUG PRODUCTS USED

Day to Day Collection
Land that I Love Mini Icon Stickers
Bar B Cute Mini Icon Stickers
Sunshine Alphabet Stickers
Seaside Summer Doodle Stamps/Doodle Cuts
Petite Prints
Green Grass Washi Tape
Gingham Washi Tape - Blue Jean
Stripe Washi Tape - Swimming Pool
Dot Washi Tape - Lady Bug

OTHER

Black Ink
Distress Ink
Copic Markers

Thursday, January 5, 2023

Lori Whitlock | 5x7 Grid Pop Up Card Tutorial

Hi Everyone!  I'm back with another fun 5x7 Grid Pop Up Card from Lori Whitlock today!  In addition to the seasonal versions of this card type, Lori has a fun 5x7 Grid Pop Up Birthday Bundle.  I have a few January birthdays coming up so I decided to make the 5x7 Grid Pop Up Card Birthday Balloons version (SVG, Silhouette).  I pieced it together with papers from Lori's Pets Collection for Echo Park Paper.  Take a peek...


I put together a quick tutorial showing just how easy these cards are to assemble.... 


Start by cutting the pieces of your card.  You will have three plain bases (bottom) and three decorated inserts.  Next add the different elements to the inserts.  I cut and added the stars, balloons and banner to the front facing pieces (the clouds are part of my patterned paper).  I also print and cut the sentiment piece using the print and cut feature of my Silhouette.  This piece goes on the back of the largest insert.


Next you want to start assembling your "grid".  Start wit the three plain bases.  The two smaller bases go on the outer sides with the larger in the middle.  Slide the front star insert into the front-most slits in each of the base pieces as shown.  The bottoms should be flush.  You may need to wiggle them a little to get them there.

Next add the second insert with the balloons.  You want to slide it into the second set of slits in the base pieces.


Lastly, repeat the process with the largest background insert.  Slide it into the last row of slits until the bottoms are all flush.

Once assembled this card folds flat to fit into a standard A7 (5.25" x 7.25") envelope.  


That's it for me today, thanks for stopping by to peek!


Monday, January 2, 2023

Lori Whitlock | 5x7 Grid Pop Up Card Penguin

Happy New Year everyone!  Now that all of the holiday presents are opened... it's time to send out some thank you  cards!  Luckily there's a new 5x7 Grid Pop Up Card Winter Bundle in the Lori Whitlock SVG Shop.  Each card comes with two options for a sentiment, one saying Happy Winter, the other saying Thank you Snow Much!  I put together the adorable 5x7 Grid Pop Up Card Penguin (SVG, Silhouette)  Take a peek...


How cute is is sweet face? I added some glitter glaze to my snowflakes to gift my card some sparkle.  The papers are Petite Prints from Doodlebug Design.


These cards fold flat to fit into an A7 (5.25 x 7.25) envelope.

Now to make a whole bunch to send out!  I hope that you all have a happy and healthy 2023!


Monday, December 26, 2022

Doodlebug Design | Candy Cane Lane Happy 2023 Pop Up Card

I hope everyone had a wonderful holiday!  We are still in the swing of things with another family party today!  Before the craziness set in I got to play with the Candy Cane Lane Collection.  I knew my project would post after Christmas so I wanted to do a New Year's themed project.  I came up with this fun little snowman pop up card.  Take a peek...


For my snowman, I used the Snow Sweet Doodle Cuts.  I cut off the Christmas tree top of the die cut, and added a little square sign in it's place.  The trunk of the tree worked perfectly as a sign post!


I added some transparency half circles to my card inserts so that I could add a whole "flurry" of the acetate snowflakes from the Bits & Pieces pack.  I love how they look like they're floating.  To attach them I used some clear glaze.  I also added the two birdies from the Love You Deerly Doodle Pop.


The happy on my sign is from the Happy Birthday Doodle Stamp set.  For the year, I used the date stamps from the Handwritten Calendar Doodle Stamps.  I stamped them in white, and added some white embossing powder so they would stand out a bit more.


I finished the base with a few snowflakes from the Frosted Flurry shaped sprinkles.  

I hope that everyone has a Happy and Healthy New Year!  I will be back in 2023 with more Doodlebug goodness! Thanks for stopping by to peek!


DOODLEBUG PRODUCTS USED

Candy Cane Lane Collection
Snow Cute Doodle Cuts
Happy Birthday Doodle Stamps
Handwritten Calendar Doodle Stamps

OTHER

Lawn Fawn Pop Up Platform Card Dies
Liquid Glaze
 Lawn Fawn Stitched Square Die
White Pigment Ink
White embossing powder
Acetate

Tuesday, December 13, 2022

Lori Whitlock | December Creative Team Blog Hop


Hi Everyone!  It's time for the December Creative Team Blog Hop at Lori Whitlock.  You should have arrived here from Traci's Blog.  Here's the order for today's hop!

Kathy Skou {you are here!}
Anita Mulcahey
Brandie Adams
Ashley Cook

It's getting down to the wire for holiday gifts!  If you're giving gift cards, Lori has the cutest new Gift Card Huggers!  I made the new A2 Hugger Gift Card Holder Cat (SVG, Silhouette) and the A2 Hugger Gift Card Holder Dog (SVG, Silhouette) to wrap up a couple of last minute presents!


Aren't they cute??  They come with an A2 Envelope to mail or package them up.


And when you open them there's slots to hold the card (top part) and a nice to/from note.  I used Doodlebug Design's Candy Cane Lane and some cardstock to piece mine together.

There's a sale happening in the Lori Whitlock SVG Shop!  Use code DEC2022 to get 30% off all SVGs, Fonts and Commercial Licenses!


Also, how about a free file!!  This file is free for today only!  No code or minimum required.


Your next stop is Anita!  Have a great day and a fabulous holiday!!

Monday, December 12, 2022

Doodlebug Design | Candy Cane Lane Advent Calendar Train

Every year I love making a new Advent Calendar with Doodlebug's Christmas Collection.  This year I worked with Lori Whitlock to come up with this fun train SVG... and I'm so happy with how it turned out using the Candy Cane Lane Collection!  Take a peek...


I started with this SVG file from Lori Whitlock.  I made the base of the train with white cardstock.  I then started decorating with the papers and embellishments from Candy Cane Lane.


I made Santa the conductor, of course!  I used the Sweet Santa Stand Alone Doodle Cuts to make him.  I also decorated the sides of the conductor's box with cute presents from the Odds & Ends.


I covered each of the 24 boxes with papers from the 6x6 pad.  I used the new Alphabet Soup Puffy Stickers to number my boxes.  The wheels also have some sprinkles in their centers.  To embellish a bit more, I added more Odds & Ends to some of the boxes.  The boxes are a good size I could fit 3 candies in each.


The other side of the train was decorated in the same manner.  I have a fun trick I used to make my Santa show the same from both sides of the train... I cut one Santa and all his pieces from  my papers.  Then, I turned those papers over and cut a second set of pieces.  This gives you a mirror image of your first set to glue back to back so you can have him look the same on both sides!


The front of my train was decorated with a star from the icon stickers sheet and I made some snowflake "smoke puffs" using the snowflake dies in the Snow Cute Stand Alone Doodle Cuts.

Luckily I didn't eat all the candy before it was time to fill the boxes!  That's it for me today, thanks for stopping by to peek!


DOODLEBUG PRODUCTS USED

Candy Cane Lane Collection
Sweet Santa Stand Alone Doodle Cuts
Snow Sweet Stand Alone Doodle Cuts
Petite Prints
Alphabet Soup Puffy Alphabet Stickers

OTHER